 The prominent gap seen in the photo above to allow for the insertion of a cheater strip as described in an earlier post was filled this evening. It was actually fairly easy to get a strip planed down to fit. Now I just have 5 more cheater strips to get into place.
 The photo below shows the kayak side after 6 strips per side, bringing the strips in this region right to the point where I have to make the sharp curve to the kayak bottom.

I may have a problem developing at the stern. Where the strips meet it is apparent that the strips on one side of the kayak are ~3/16" higher than on the other, illustrated in the next 2 photos (same spot, different angle). I'm not sure if this is really a problem or not; I fear that it may cause problems down the road when I'm trying to fill in the bottom and have things look even.


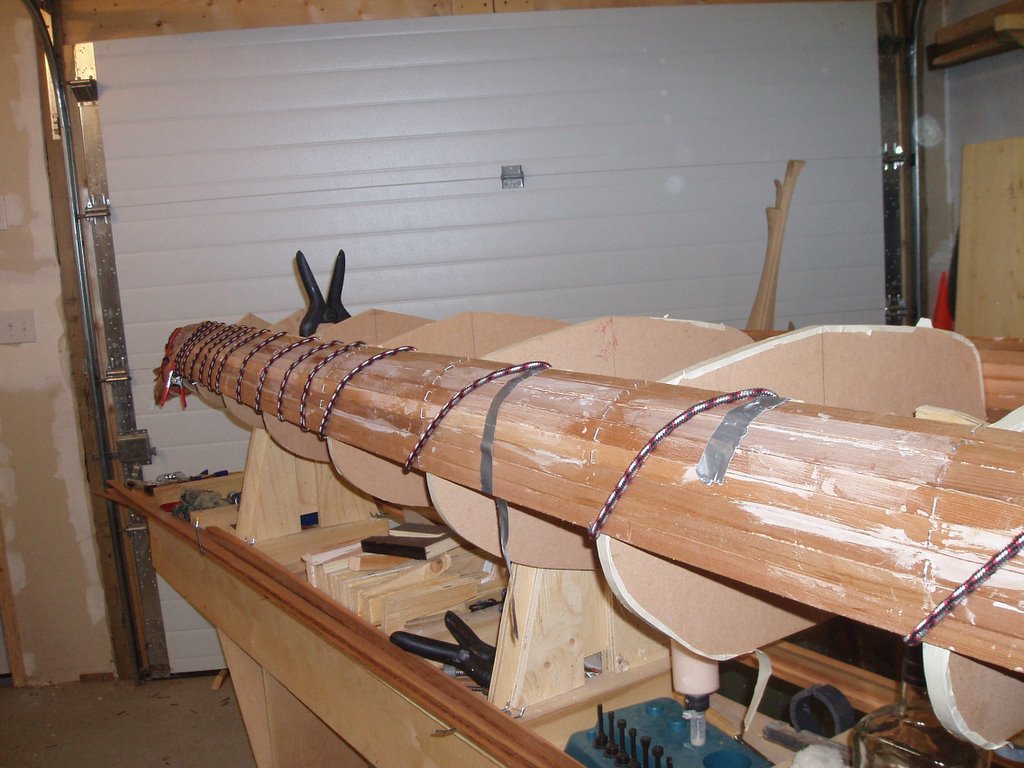
Rounding the chine while maintaining a tight joint without gaps is giving me some troubles. Since the bead and cove on these 1/4" thick strips were cut with a 1/4" router bit, the strips really only fit together perfectly if there is little angle in the joint. (For more on bead & cove of strips, go here.) The more angle there is, the more that the inside portion of the cove gets in the way. Some strip manufacturers and commercial builders use a slightly larger radius (5/16") bead & cove which allows the strips to better fit together around a tight curve. Recently 5/16" radius bead & cove bits became available to the home builder and after my experience the last couple of nights, I think that this would be pretty helpful in areas where the curve is tight.
Since my strips are now more horizontal than vertical, my bungee cord is no longer really pulling the strip down tight against the previous strip. This is in a way confounding the problem described above. Thus, some small gaps have formed as seen in the photo below (taken with a light shining behind the strips to better show the gap). Part of the problem might be that the cove on some of these strips was really shallow. I used a round rasp to put a better cove in, but it may not be enough. This won't affect the function of the kayak but it will probably soak up a bit more resin and anyone who chooses to stick their head inside the boat and wear it like a hat will see some sunlight. I'll probably fill the gaps with a mixture of sawdust & epoxy to make them a little less evident, but it'll still add a couple of grams to the boat (an issue if there are lots of gaps).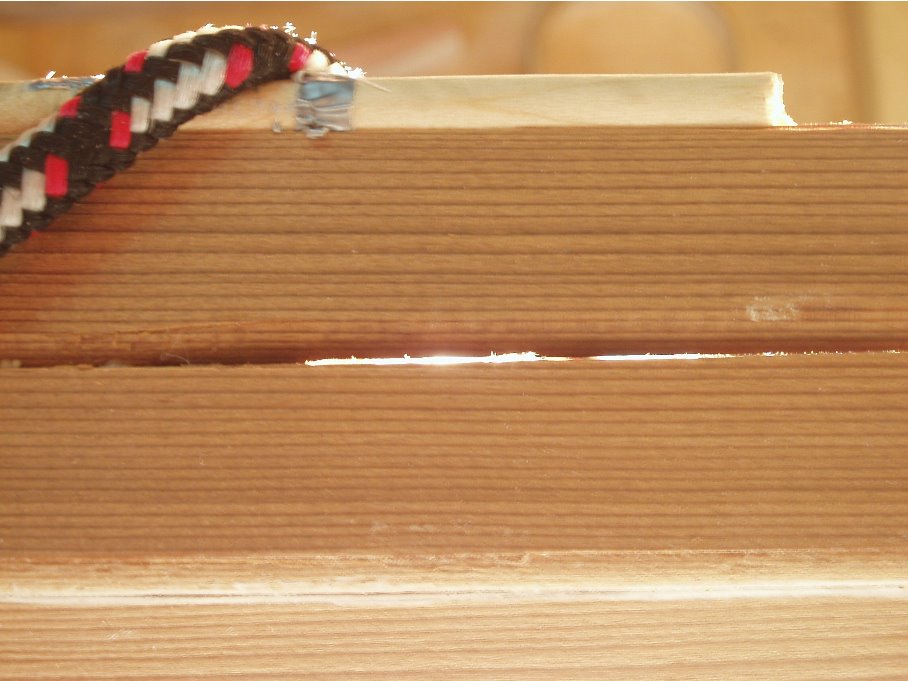
Hey there! I caught your blog scrolling past in Blogger.com's list of recent updates. I just started my own kayak blog at http://cwkp.blogspot.com.
ReplyDeleteA couple of the online diaries I've read mention that things go a little smooter if you wipe the excess glue off really well. The dried glue is a tougher surface than the cedar and you have to be careful when sanding or scraping. Apparently it also adds time to the process.
The glue residue left behind after wiping up appears very white & very prominent in these pictures. Although it is certainly there (a factor of working at the cooler end of the spectrum I believe) it's not nearly so bad as it appears in the photos.
ReplyDeleteBryan