Monday, January 30, 2006

Planning Ahead

I need to start thinking about how much epoxy and fiberglass to get. The recommended quantity of epoxy according to Nick's book is 1.1 gallons. Other places I've seen recommend getting 2 gallons of epoxy and I will probably do this, hoping I don't actually use much of that second gallon (not only is it very expensive, it's also heavy). It would be kinda crappy to run out at a critical point and I won't have the option of running down the street to Churchill Hardware to pick up some more, so I guess I'll have to bite the bullet and get the larger quantity. To get 1 gallon plus 1 litre would still be cutting it too close, and the larger volume is a better value. Plus, by all accounts, first time builders use too much epoxy. I'll be using the West Systems 105 resin with the 207 hardener.

The second thing I need to figure out the quantity of is the glass cloth. It comes in a 60" width and I can lay it at an angle to get the best economy out of the cloth. I did some cutting and pasting to come up with the following diagram to help me decide how much cloth I need: The above layout uses 1 layer on the inside and one on the outside with an extra layer on the bottom. The cutoffs should give me enough to work with for the other areas that need to be glassed. By my figuring, the above layout tells me that I need to get ~17 yards. I'll probably just round it up to 20 yards to make certain there is enough and keep the extra (assuming there is much extra) to go along with the extra epoxy so that I have a head start on the next boat! (Or all the other little things that one can build out of epoxy & fiberglass, such as a side view mirror for the car after my wife drops another boat on it.)

Sunday, January 29, 2006

The Lee Valley/Canada Post Problem

The Lee Valley/Canada Post Problem

Some interesting reading regarding Lee Valley versus Canada Post.

Deck Half Done

I got nearly 4 hours of work done last night so I am now about half done stripping the deck.
Please excuse the frankensteinian cut & paste panorama.

Monday, January 23, 2006

Rick Mercer's Blog

Rick Mercer's Blog. Very funny satire, good election day noon-hour reading, nothing to do with boatbuilding.

It's Election Night in Canada! - Go vote!

The image at right was posted on the aforementioned Rick Mercer blog, credited to Doug Webber, and was used without permission.

Tuesday, January 17, 2006

Yellow Cedar

The wood I am using for contrast is Yellow Cedar, Chamaecyparis nootkatensis. This wood is a pale yellow in colour, in contrast to the dark brown/red of the Western Red Cedar which makes up the rest of the hull. The name is a bit confusing as it is a cypress rather than a cedar (thanks to Rod for clearing that up for me). When I first started working with yellow cedar I was struck by the difference in smell and working characteristics as compared to the red cedar. I thought they were different varieties of the same thing so I expected some common ground in the wood characteristics. The yellow cedar has a more uniform appearance and texture, and is much less likely to split along the grain as I whittle a taper onto the end of a strip. The most striking difference though (other than appearance) is the smell. I expected something cedar-like in smell but being a cypress rather than cedar the smell is quite different.

The strips of yellow cedar I have (purchased from Orca Boats) are also of a much better quality than the red cedar strips (purchased from some guy off the net). The red cedar strips vary somewhat in thickness and width, and have places on most strips where the cove is not properly cut all the way, or where the bead is off center, or there are bumps along the bead. I gather that some of this is normal, and I did get a pretty good deal on the wood so I'm not dissapointed, but next time I may make my own strips or make use of the fancy new set up of the folks over at Kisseynew Canoe Co.

Bow Deck Stripped

Thanks to all who gave their input into the design for the deck. The design I decided on is something similar to "L" shown in a previous post. Below, I have stripped the deck so that the strips extend beyond what I have decided the border of the contrasting strips will be. To define a fair curve I am using a 1/4" piece of strip which is the bead cut off of one of the strips that was to become the center strips (the bead was cut off so that the strips could be laid on the deck cove outward in the same manner as the keel was stripped). This pattern by the way used up nearly all 114 feet of yellow cedar that I had. It was nip and tuck in the end with 6 feet or less left over.

Here I have roughly cut the strips back to the curving line. It still needs to be smoothed out. I might change the curve a little bit to make it a little more curvy but I need to sleep on it. Now that the bow is stripped, how about the addition of a figurehead?

Friday, January 13, 2006

Deck designs & exceeded bandwidth


Image troubles! In my previous post I linked to images hosted on my geocities.com site, which allows only 4mb of traffic per hour. That was promptly exceeded. (I think I'll be moving my web site soon.) So now I'll load those images directly to Blogger. The second set of photos were created using the kayak design tool found on the Action Fish Kayaks web site.

Deck Designs

It's time to start thinking about how I'm going to design the deck using the contrasting strips of wood that I have. Most of my wood is a dark brown in colour but I have ~100 feet worth of a uniform light coloured wood (yellow cedar). I have sketched out a few ideas that I think might work with the wood I have. Please submit your vote by leaving a comment below!

Some notes on the designs:
  • * I didn't take the time to fill in colours on all of the designs, you'll have to use your imagination for the others.
  • * I used the most powerful graphics tool I could lay my hands on for this - MS Word! So that will explain a lot when you view the designs. (I copied and pasted the kayak outline off the Guillemot site, cleaned it up and used that as my template to overlay my designs onto.)
  • * I have more of the dark brown cedar than the light brown. The designs are geared towards using less wood in the light colour.
  • * Ease of stripping is important.
  • * I may incorporate some sort of compass rose inlay into the deck. Pedro has an excellent example on his kayak.
  • * There will be a forward hatch and rear hatch in the deck, and I am going to attempt to do flush hatches.
  • * There is a spot shown just fore of the cockpit in these designs, that was to indicate the location of a paddle park. However, I think I may move it to the side of the cockpit instead like John did, but haven't decided (having it in front of the cockpit with the paddle perpendicular to the kayak may be easier and quicker to use and add a bit of stability?). It's a long time before I really have to consider this fully.

I am open to suggestions, etc. Perhaps somebody with stripping experience can point out the advantages or pitfalls of certain designs from the point of view of what's going to be easy or difficult to strip. The ultimate decision will be made when I start playing with the strips laying things out on the deck.


Theoretically you should be able to click on the picture above and have it open up a larger version. That doesn't seem to be working for me, so to see the full-sized version, click here where I have it uploaded to my main web site.

Thursday, January 12, 2006

Bottom's Up!

With help from my friend Rob, I finished the bottom tonight. Here he is hard at work.


I did a bit too, see here's proof:
Here I am checking the second last strip for fit. It is really just a long thin sliver. I turned a strip on edge, then planed it down to the right thickness to fit it in. Thus, it's about three times taller than the gap it is to fill. I think this worked better for this thin strip, partly because it gave me more material to hold onto and also ensured that the sliver would sit flush when trimmed.
One more gap left to fill:
Here Rob checks to see if his carefully trimmed strip fits into place:You'd think with a pencil that colour that I wouldn't lose it so often.
Here I am gluing the final bottom strip into place after Rob's careful trimming:

Voila! It fits!

Work Bench View

Just thought I'd post a picture of what a well organized work bench in a boat building shop should look like.

Wednesday, January 11, 2006

Tighter than a ......

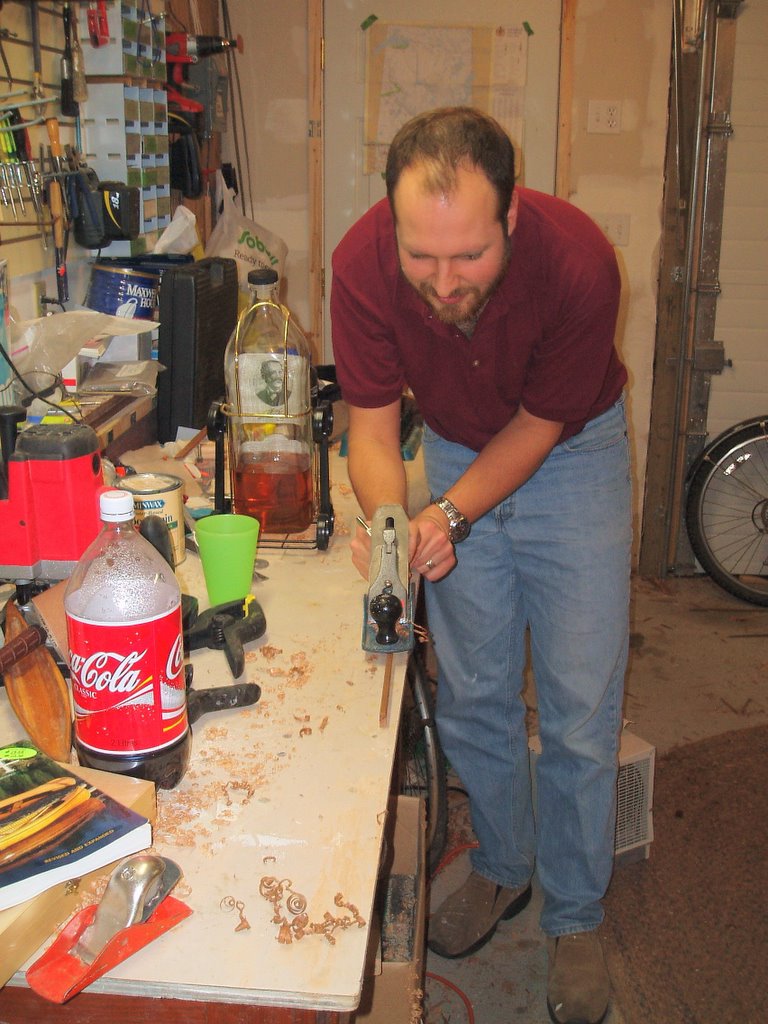
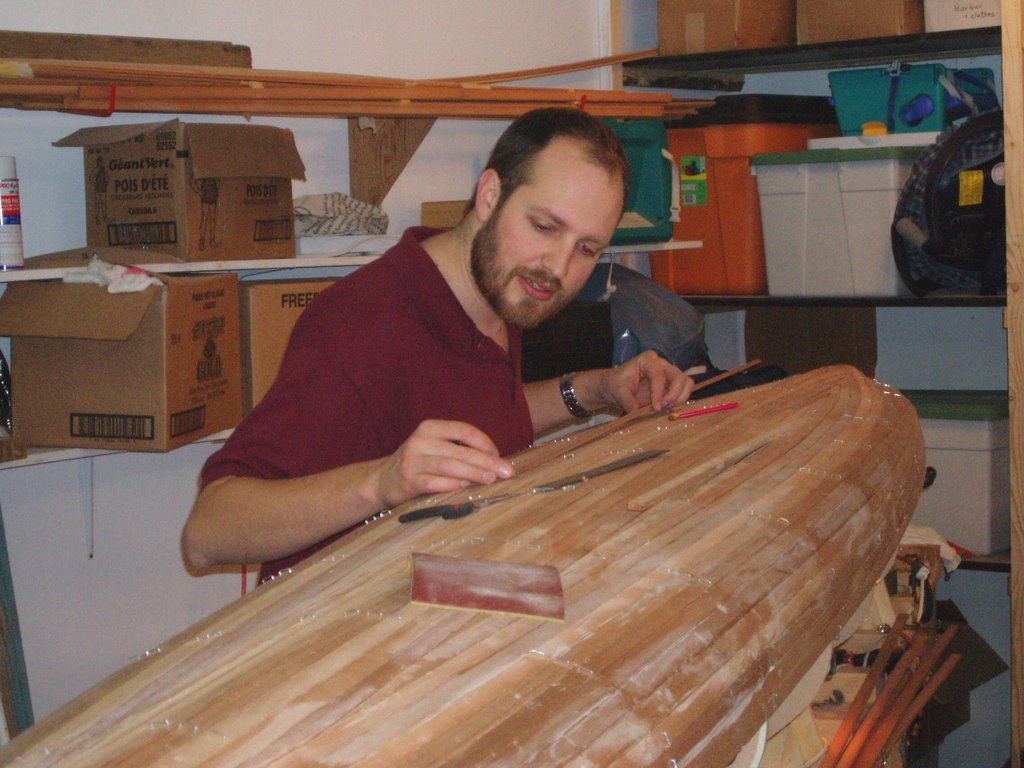
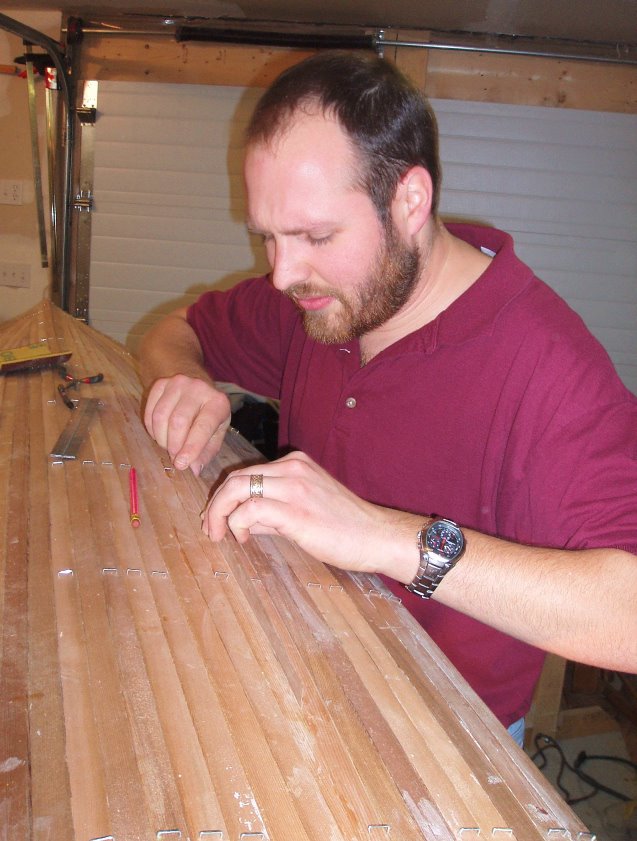
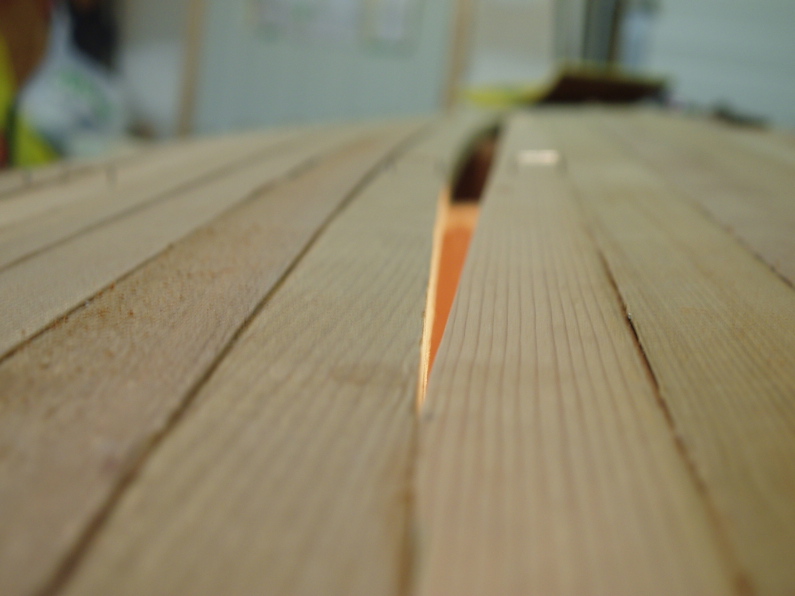
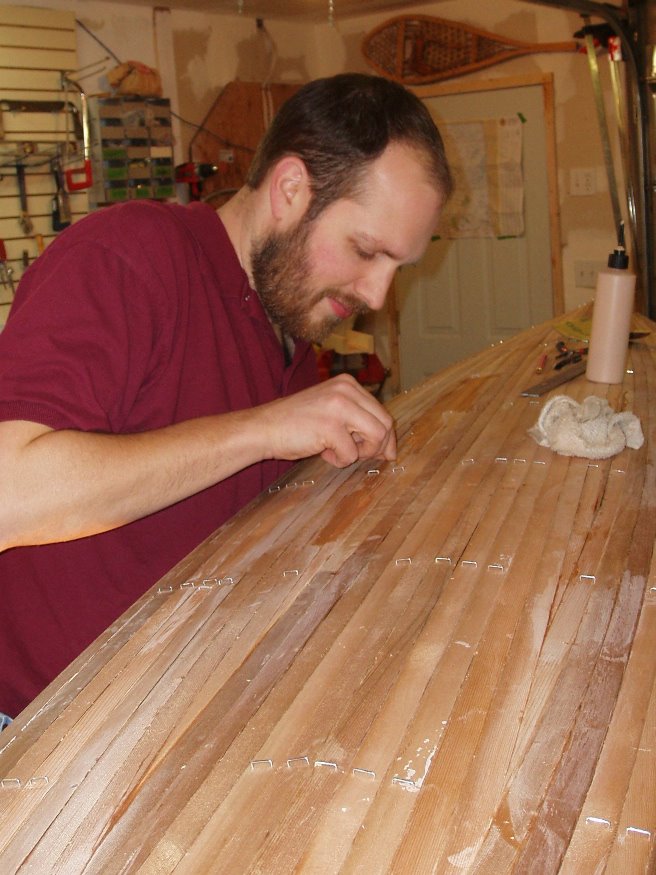
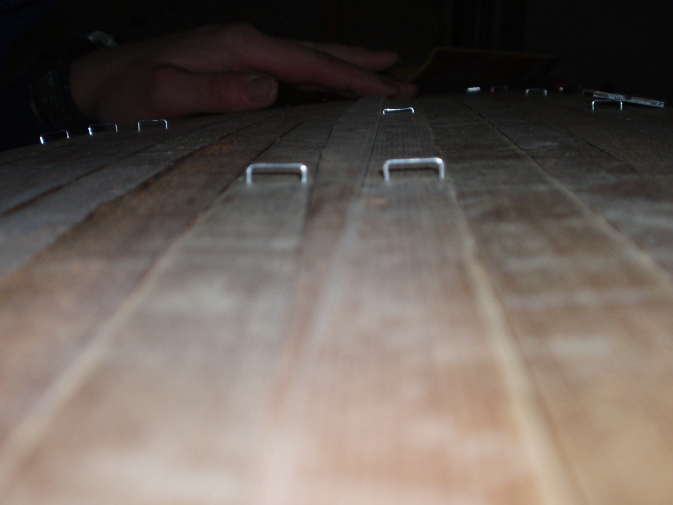
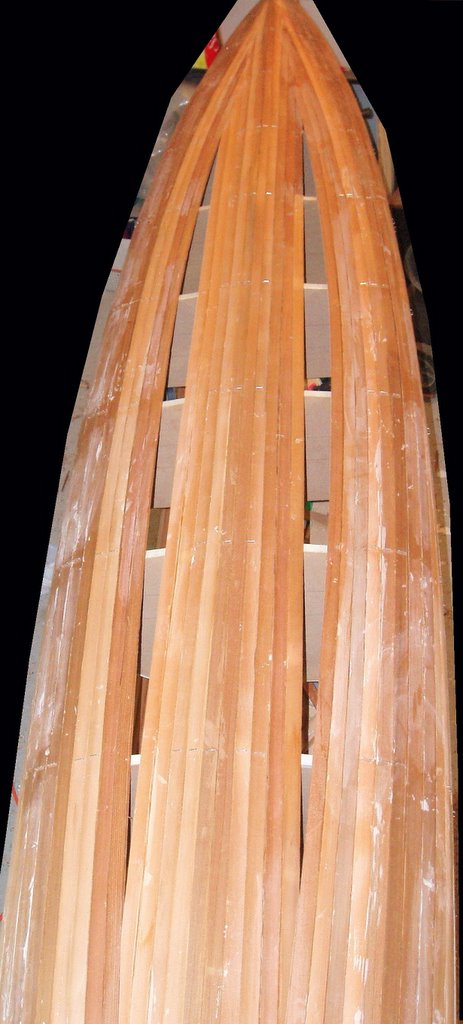
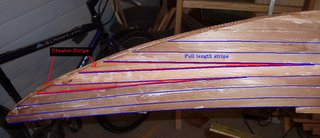
With a less than 3 strip gap on each side of the keel, I got 3 more tight SOB strips in last night. Man oh man, my patience was being tested. First of all, I got the first strip tapered on end, then lined up and marked the taper on the other end. I then whittled the taper with a knife and tidied it up with the small block plane then tried it for fit - it seemed OK, just a tad long so a bit more with block plane and sand paper. The length was perfect, but the taper became concave due to the thin strip flexing away from the plane and so a big gap was left. So I decide to scrap that end and do it in two pieces so I cut it to have the joint line up with one of the forms. OK, get another piece - dang, that was pretty much my last piece of that particular shade of cedar so I won't find anything to match properly. More digging through the pile and I find one that's not too far off. So I put a new taper on the end - whittle, plane, plane, plane, sand, sand - voila! perfect fit. Great, now I just have to trim the other end so it makes a nice inconspicuous butt joint with the other piece. I marked the length with a pencil and take the strip out and cut it in a miter box, trimming it slightly long so that I can be assured of a tight fit. Back to the kayak, slip the tapered end in place and see how the other end lines up - Dang I'm an inch short. It seems there was another pencil mark on the strip from when I was lining things up previously before cutting the taper, and I cut to the wrong mark! At that point I was frustrated but in good humour so I decided to leave it, and cut a 1" piece to span the gap, thinking it might not look the best but most people wouldn't notice and if they did it would be a funny story we could all look back on and laugh at some day.
I then moved over to work on the other side of the keel line, where I thought perhaps I would have better karma. Again, I whittled & planed my taper onto one end, tested it for fit then moved to the other end to repeat the process. The strip being a tad too long, I planed another hair off of it and tested it again for fit and dang! It's too short! So, I cut the strip again at a form and then tapered a new strip to replace the end I cut off. This time when trimming the strip for length I made darn sure to not cut it too short and successfully managed to get it to fit without further incident. The second strip on that side (second last strip for that gap) was to fit into what by now amounts to a gap that is more tapered than straight. The problem is that in order to fit the strip into place you must fit it into the taper on one end so that the bead on the strip nests into the cove on the strip already in place (the cove has been cut off of the other strip it's tapered edge is mating against, and off of the strip being placed, but a cove still remains on the strip alongside the strip being placed), then bend the strip in the middle allowing it to bend mostly only in the untapered region and slip the second taper into place and see if it fits. Good luck. It was one heckuva fight to get that strip in place and I broke the cove quite a bit in my effort to do so. A second set of hands would have been very helpful. In my fight with the strip while gluing it in place, I broke the tip off of one of the tapers. This actually turned out to be a good thing. It was a 1.5" piece that broke off and it stayed nicely in place, at the tightest part of the taper which is the most difficult to slip into. I then had a much easier time dealing with the other 95% of the strip to slip it into place then mate the broken ends. I think on the other side I will try to do this second last strip in two halves, or ensure I have help (hint hint Rob), or probably both.

I was still a little troubled by that f*cked up piece on the other side so before calling it a night, I went back and cut a new piece to replace the too-short half of the strip. This went fairly well other than that I forgot to put a bead onto the taper so that it would fit into the cove of the piece it was butting against. Luckily, I realized it before I had trimmed the strip for length and was able to quickly plane a bead on and get it to fit.

So, my tally for the night was
  • 9 tapers cut to fit,
  • 6 tapers on 5 pieces of wood glued in place,
  • 3 tapered ends cut off & discarded,
  • 1 broken strip,
  • 2 strips left to go on the left side,
  • 1 strip left to go on the right side.
For future reference, next time I would start cutting the cove & bead off a bit earlier, with 4 or 5 strips left in each gap since trying to fit short tapered strips into a cove is a mighty PITA.

Monday, January 09, 2006

Instructables: step-by-step collaboration

Instructables: step-by-step collaboration
I haven't found anything there that has anything to do with boat building but dang it's a cool site. A little imagination and I'm sure you could find something to relate to boat-building, like the marshmallow gun to defend yourself against predatory otters, or maybe adapt the bike light system to ward off power boaters.

Sunday, January 08, 2006

Final Hull Strips

Only 6 strips left to go on the bottom, 3 on each side of the keel. The width of each gap now is about 2 1/3 strips wide. The 3rd last and 2nd last strips will have the cove planed off so that the final strip, with both bead and cove planed off and the strip cut to the right shape, will be able to drop into place (that's the theory anyway). I wasn't able to understand what to do as written in Nick's book so this is the method I'll use, as gleaned from the KBBB.

Friday, January 06, 2006

Blogger Photo Troubles

I realised today that some of the pics I inserted in the last post do not enlarge when you click on them. I was having troubles uploading photos yesterday. Blogger simply wouldn't do it for an hour or two, each time I tried it would start the upload and then tell me the server was unavailable, or something of the like. I kept re-trying and eventually it started working again. It now seems that each of those earlier attempts did upload the photos but it didn't link it into the post like it was supposed to so I had no way of knowing. It would also appear that there is a limit to the number of larger photos a post can contain and I exceeded that limit so it made all the other photos but the first two small versions. I can't find any further info on this so I'm only guessing. I am going to rename the picture files and try again for those 4 photos that didn't work. See the original post for the descriptions.


Aaaarghhh!!!!!!!!!! It simply aint working! I even tried to add the photos in the "large" size instead of the medium size I usually upload them as. Maybe I've used up all of my alloted space for photos? But that isn't supposed to happen with Blogger.

Thursday, January 05, 2006

Bottom Strips


Last Monday night I finally got a bit more work done on the kayak. I am currently filling in the bottom of the boat as you can see from these photos. In the photos bright splotches appear over much of the boat. This is glue residue which remains after the excess has been wiped off. Something about the camera & flash are extremely adept at detecting this residue because it is barely visible by eye. Please believe me that it looks much better in person.

I have written previously about the joining of the tapered strips so I took a couple of photos to illustrate this, pasted in below. Click on the photos for a larger view.

In the above photo I have added lines in order to highlight the junction between strips. A herringbone pattern emerges on each side of the kayak as stripping proceeds. Below is a close-up of the joints illustrated above.

Previously, I have posted about the cheater strips which I used in order to reduce the bend of the strips at the bow and stern. While I was taking pictures and drawing pretty lines, I decided to add a couple of photos to illustrate this part of the construction. Again, click on the photos for a larger version.

In the photo above I highlighted the normal-length strips with blue. When the blue-outlined strips were put in place I left gaps 1 strip wide at the tip, to be filled in later. The gaps were then filled in with the cheater strips, outlined in red in the above photo.

Here's a photo without any extra lines drawn on to show off that sexy bow. The ends of the strips where they overhang the bow were sawed off and things cleaned up a bit with a small block plane. Between the strips is a chunk of mahogany that forms the internal stem (see it nearly naked here), a 3/4"x ~1" curved piece of wood to which the ends of the strips are glued. Just a sliver of that piece of wood is starting to show here. Later, I'll plane things down farther until more of the stem is exposed then I'll glue on an external stem made out of some hardwood laminations (mahogany? ash? cherry? walnut? a combination?). To see what the external stem should look like see this one that Charles Leach did using a contrasting wood. There are also a couple of nice illustrative photos here. But anyway, that's all a long way off yet. Back to the hull .....