The line was first marked onto the deck in pencil following a half template cut from 1/8" hardboard. A half-template is a template which is only half of the opening and is then flipped over to do the other half. This helps to assure that the two sides are actually symmetrical and prevents the appearance of any errors in the way the curves are drawn between the two sides (the template is drawn from a set of "offsets which are essentially a series of x & y coordinates then you connect the dots to get the full shape). I was initially a bit timid about how to get the flat template to lay properly on the deck which is highly curved in in this particular spot. Should I push it down and force it to conform to the shape of the deck as best I can, or allow it to sit flat and just trace straight down from the edge of the template, even though it may sit 5" or more above the kayak in places. I eventually decided it probably doesn't matter too much and stapled the template down to the deck in a couple of spots to ensure it didn't shift on me, curving it to follow the contour of the deck somewhat but not forcing it down anywhere. I then held my pencil fairly vertical and traced around the template. I then flipped it over and repeated for the other side.
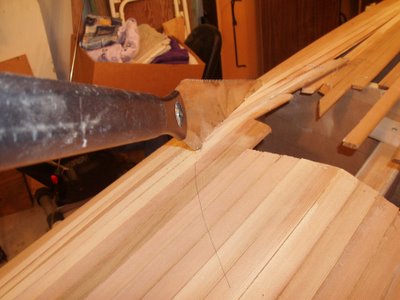
 The hole was cut just slightly to the inside of the line, to be trimmed to the line later with sandpaper, chisels, etc. The cut was started using a broken off hacksaw blade clamped in vice grips. This narrow blade allowed for a very thin kerf and was able to cut a fairly tight radius around the corner. Once around the corner at the back of the cockpit, I switched to the japanese pull saw (shown in the pictures) to cut the more gently curving portions.
 The hacksaw blade in vice grips saw worked OK, but it wasn't terrific. Also the japanese saw worked well, but wouldn't work for anything more than a gentle curve. Cutting the recess (and later the actual cockpit opening) is a trial in advance of cutting hatch openings later on. Cutting the hatches will require something able to cut a smooth line and follow a curve well. Often a power jig saw is used, but I have some misgivings about using my hand-me-down 30 year old saw for this purpose, or any other power tool for that matter. In my experience, nothing screws up a project faster than trying to save a bit of time using a power tool. I think then, that this little saw (or this one) from Lee Valley Tools might be just the ticket.
 It would allows for a thin kerf, the fine and easy cut of a japanese saw, and it's narrow and would have no problem cutting the oval shape of a hatch. At $18 it's not prohibitive either. I think I will get this saw now, but I just wanted to rule out a couple of options first (one more option to try would be to use a fine tooth jigsaw blade in the vicegrips). I also think small saw like this would have been handy for rough cutting strips while stripping the kayak.
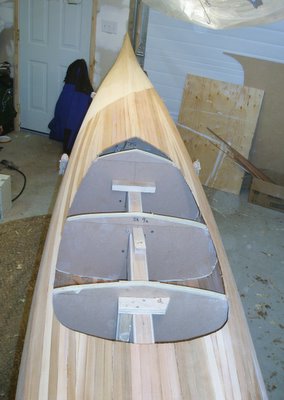
Here are a couple more photos of the cut out cockpit recess.

 Looks nicer with a hole in it doesn't it?
Now I have to fill that hole back in, at least partially so that there is a couple of inches worth of wood all the way around the outer edge. The difference from what was cut out is that the pieces that are put in will go in horizontally across the opening such that they sit parallel to the floor on a flat curve from the peak at the front to the sides where it is lowest then up just a bit at the back (that second last picture above should help to visualize this). The tops of the forms in the recess area have now been broken away (they were pre-cut then hot-glued back in place prior to stripping) so that they are out of the way for the building of the recess. Once that recess has been stripped, I can cut out the hole for the actual cockpit opening (actually that probably won't occur until after the deck has been glassed on the outside).
After I had planed off the high points, I started up the sander with 80 grit paper just to see how that goes. I never bothered with the dust mask or connecting the shop-vac up to collect the dust because I was only going to be sanding for a couple of minutes. Well I ended up doing a fair bit of sanding, the whole deck in fact. It took me about an hour or so. I figured there wasn't much dust being kicked up so I didn't worry about the mask, even though I know that wood dust isn't very good for the lungs, and cedar dust is the worst. After being at it for a while I looked up across the room and realised that the air was full of dust. When I went to bed later that night I began to hack and cough, and it got worse the next day. 48 hours later and I think I'm nearly back to normal (I am/was on the tail end of a cold so it is a bit difficult to say what's due to dust and what's due to virus). Of course the next day in the lab Justin, a lung function specialist with whom I share lab space, noticed the hacking cough and after my explanation admonished me for my foolishness. He's right of course. Ever wonder why people use cedar chests to store quilts and long term clothes storage, or use cedar inserts in dresser drawers to ward off insects? It's because cedar trees have gotten very good at producing chemicals that some insects aren't particularly fond of. And your lung epithelial lining isn't particularly fond of it either. Even without the toxic compounds, it's probably not particularly good to have these extremely fine fibers (the small size of the dust allows them to get into the deepest cavities of your lungs) irritating your alveoli (remember, Justin's the expert on that stuff not me). But (cough) I digress.
No comments:
Post a Comment