Sunday, December 17, 2006
EPOXYWORKS - Fiberglassing a woodstrip hull
I just came across this article by Ted Moores on the West System's website from issue 16 of EPOXYWORKS magazine. It's a good review of the Moores method for applying epoxy and filling the weave as described in his books. Note that this method is quite different from that described by Nick Schade in his book - Schade advocates using a squeegee to apply very thin coats to fill the weave. Moores is more about applying thick coats of epoxy to build up a thick layer over the glass cloth.
Saturday, December 16, 2006
Bubbles!
 No, not that one. Having saturated the glass with epoxy on the final seam between the hull and deck and monitored it for a period to ensure that no dry spots or bubbles developed, I left the seam to cure on it's own. As soon as I turned my back a bubble developed, lifting the glass cloth and forming a pocket about 1 3/4" long. Once the epoxy had partially cured I excised the cloth over the bubble, trimming away any loose glass. In the photo below you can see the piece of glass/epoxy which has been cut out
 I then scraped the edges in order to allow a smooth transition.
 Later, while adding a final fill-coat of epoxy to the hull, I epoxied a patch of glass in place. This time I baby sat it for a few hours in order to prevent the repeat of the bubble. The bubble did come back (the air seems to have been coming from the slight gap that is the seam between hull and deck) but at least I was able to minimize it by pushing out the air as it accumulated. In the end I had to be satisfied with a small bubble in the glass which was largely filled with a subsequent application of epoxy.
With the seam taken care of, I rolled on a final coat of epoxy onto the entire boat to completely fill the weave of the cloth and add a layer of protection for the underlying cloth. With the shop temperature stable at about 20C, I used a West Systems foam roller cover* which I cut in half and used on a small paint roller handle. After mixing the epoxy in small batches I poured it into a paint tray with a small disposable insert which has the added benefit of allowing heat from the exothermic curing epoxy to dissipate better than when it is pool into a mixing container. I started in the morning by rolling a coat of epoxy onto the hull. The foam roller applied the epoxy in a nice thin layer, but left a million tiny bubbles behind (it made little difference how much pressure I applied nor how much epoxy was loaded on the roller, and the epoxy was warm). Thus, I tipped off the epoxy coat as described on the West System web site. The strategy I used was to roll out a section of epoxy on the hull running the roller perpendicular to the boat, doing about 3 feet on one side, then going to the other side and doing another 3 foot section, reloading the roller as necessary. I would then go back over both with a dry foam brush and brush the epoxy parallel to the boat then start the process again on the next section. Once the coat was complete, this was allowed to cure for about 10 hours until late in the evening I repeated the process on the deck. Both coats overlapped at the seam so that the seams received two fill coats of epoxy. The boat now looks pretty good again with that nice wet look of fresh epoxy. At some point I will have to ruin it all by wet-sanding the whole thing to smooth out all the little bumps (the epoxy does not give a very smooth finish in my hands) and prepare it for the varnishing.
Here is what that bubble looked like after the repair and a fill coat of epoxy:

I may have to add another fill coat to this area, but otherwise it should be barely visible by the time everything gets smoothed out and eventually varnished.
I also set my daughter into the kayak so that she could try it out and to pose for a couple of photos. 

*I picked up a couple of WS roller covers at a local woodworking store which was having a closing out sale in June. I took the opportunity to purchase on sale some of the "800" polyurethane foam roller covers, a couple of the "804" mixing sticks, and a couple of the "808" plastic spreaders (squeegees). A couple of weeks later the rest of the inventory was auctioned. I had hoped to be able to pick up a number of items for a low price, including a dust collector, bench sander, etc. but everything went for way more than I could afford. I was getting rather annoyed at the fellow who kept bidding on everything I wanted and obviously had more money than me to spend (which isn't saying much, I was really only willing to spend a small amount of cash). I found out later that this fellow was starting a woodworking shop for inner city youth which produces custom furniture for sale. It seems the tools were being purchased for a very good cause. Everything I chose to bid on I was quickly outbid by others in the room. In fact, I usually didn't even get into the bidding before the price went beyond my limit (I believe some of the items went for more than retail price!). The one area where there was very limited interest was in the inventory of fiberglass related items. They had a couple of gallons of WS epoxy and hardener but this too went for more than I was willing to pay (I didn't really need more epoxy after all), but there was a roll of 6 ounce glass cloth on a large stand that I think only one other person bid on and they were not very enthusiastic about it. Thus, I was able to purchase about 10 yards of West Systems brand 6 oz cloth for $30. Now of course I'll have to build another boat in order to have a reason for using it.
Green Tape & An Unemployed Bum
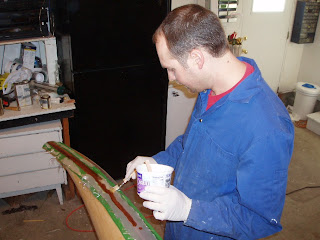
I've started to work on the kayak once again with a bit more regularity. With recent warm temperatures I decided it was a good time to do some epoxy work over the past week before we get another cold snap (we have had unusual quantities of cold and snow so far this winter). You may recall that back in June I joined the two halves of the kayak, fiberglassing only the inside of the seam, then packed everything up because we moved to a new house. Well that move threw me off and I lost all momentum with my energy being directed first toward moving, then towards finishing up the renos I initiated during the move. Add in the parenting of two energetic girls and being busy at work and there was little time or energy to work on the kayak. However, at the end of November I was laid off from my job as a "Research Associate" and now I have a bit more time on my hands (not a lot mind you, I still have to take care of the kids - the youngest started walking this week - while my wife picks up extra shifts at her job). Thus, I moved the car out onto the driveway, warmed up the garage, and fiberglassed the outside seam. I used the technique of masking off the edges as described on the One Ocean Kayaks web site.

 In the picture above you can see that in addition to the green masking tape that I ran out of, I also used brown masking paper. This paper has a light adhesive on one edge (like a sticky note) and I turned to it because it was what I had available at the moment. However, I would advise against others using the same stuff - although waxed, the epoxy soaks through the paper and gets stuck to the kayak. Thankfully it scraped away fairly easily and at least the brown colour matches the boat so if I missed anything it should be inconspicuous (at least it's sufficiently inconspicuous that I couldn't find any more of it).
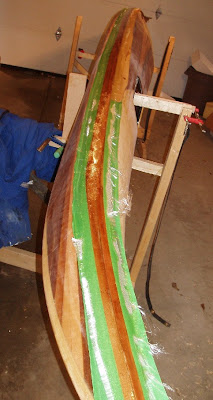

I laid down strips of masking tape to either side of the seam leaving about 3/4" to 1" on each side of the joint. I folded the edge of the tape to prevent drips from running away.
I then rolled on the 3" wide strips of glass cloth that I had cut for this purpose.
In the picture above you can see that in addition to the green masking tape that I ran out of, I also used brown masking paper. This paper has a light adhesive on one edge (like a sticky note) and I turned to it because it was what I had available at the moment. However, I would advise against others using the same stuff - although waxed, the epoxy soaks through the paper and gets stuck to the kayak. Thankfully it scraped away fairly easily and at least the brown colour matches the boat so if I missed anything it should be inconspicuous (at least it's sufficiently inconspicuous that I couldn't find any more of it). 

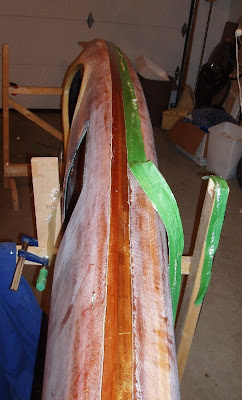
The fiberglassing of the seam went pretty much as the rest of the glass/epoxy work but on a smaller scale. Once sufficiently cured, I then trimmed away the masked tape. In the above close-up photo you can see that I went over top of the hole drilled for the grab loop; I trimmed the glass cloth from the holes while trimming the masked edges.
However, I sort of forgot one minor detail from Vaclav's instructions - I should have lifted the masking tape, pulling it away from the kayak and bending the glass right at the edge of the tape. As it was, on the first side I scored/cut the glass with the tape flat which didn't work all that well. On the other side I lifted the tape/glass as I was supposed to and it made trimming the excess much easier and in the end I was left a fairly nice edge which was easily scraped to a smooth transition. I now have about 70 feet of fiberglass reinforced masking tape - that's gotta be good for something right? I can see why people seem to always want to build another boat - next time the whole seam glassing process would go much more smoothly.
I have more on the subject of glassing the seam and addtional progress to report, but I'll address those in the next posting or two.
p.s. If you are in the Saskatoon area and would like to hire a molecular biology technician for generous sums of money, please let me know! ;-)
Subscribe to:
Posts (Atom)