I also managed to make some progress on the kayak over the past few evenings. The cheek plates have been glassed (4 oz) both sides with a fill coat of epoxy on each side. The bulkheads have been similarly treated but the front bulkhead (support for the footbrace) received 2 layers of 4 ounce glass on one side and one layer on the other. The bulkheads were trimmed and installed into place using a fillet of epoxy. For the record, epoxying bulkheads into place on a fully decked boat is a real PITA. The fore bulkhead was some distance (18"?) from the hatch opening so in order to get in there and apply my fillet, I turned the boat upside down on the stands then crawled underneath and poked my head in through the hatch opening. However, there was no room in the small opening for both my head and my arm, so the actual applying of the fillet (and associated clean up of gobs of epoxy) was done mostly blind. I used a 20 ml (?) syringe with the tip bored out to 1/16" to apply the thickened (WS 406 colloidal silica) epoxy then smeared it smooth with a gloved finger. The same thing was done from the other side but, thankfully, the cockpit opening is a bit larger than the fore hatch and the space less cramped (though the bulkhead is farther from the opening). The rear bulkhead was a much easier beast to tackle, though it too involved reaching into cramped quarters through the nearby hatch opening. The much, much easier to tackle cheekplates were installed with a fillet covered with a strip of 4 oz glass cloth for strength.
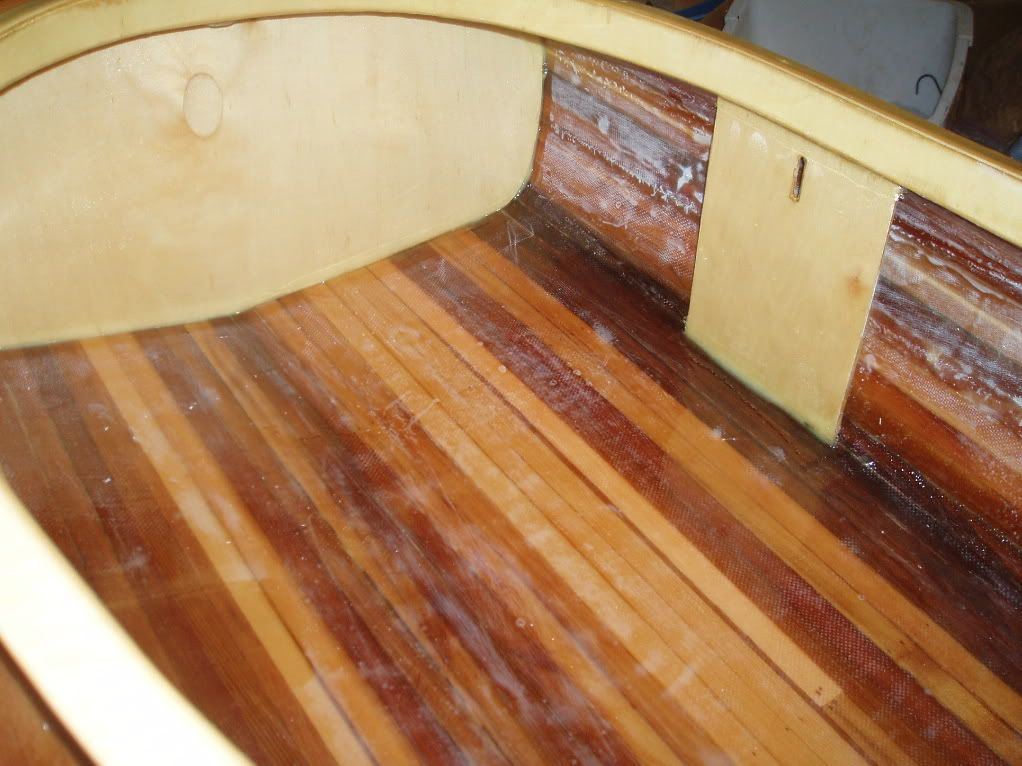
It was nice to also get the "mobies" installed on the underside of the hatches this weekend. They too were filleted in place using epoxy thickened with WS 406 colloidal silica, overlaid with a strip of 4 oz glass. The bungee cords that provide the tension can be installed after I double check that all wood is sealed with epoxy (I think I can probably use varnish on the spots that may have been sanded through to wood during their manufacture). I will create a separate blog posting (with photos) about manufacturing the Moby Latch System someday soon.
 Now I have a couple of small sections along the seam to better fill the weave on (I started on this yesterday but I have to have a close look to see if there are more spots). Once that cures I will need to do final sanding on the whole kayak. Then it's time to get ready to varnish this boat! (Yay!) Once varnished, I will install the deck padeyes & lines and head out for a paddle. (I guess I should also make a seat, make the footbraces, and complete then install the backband.)
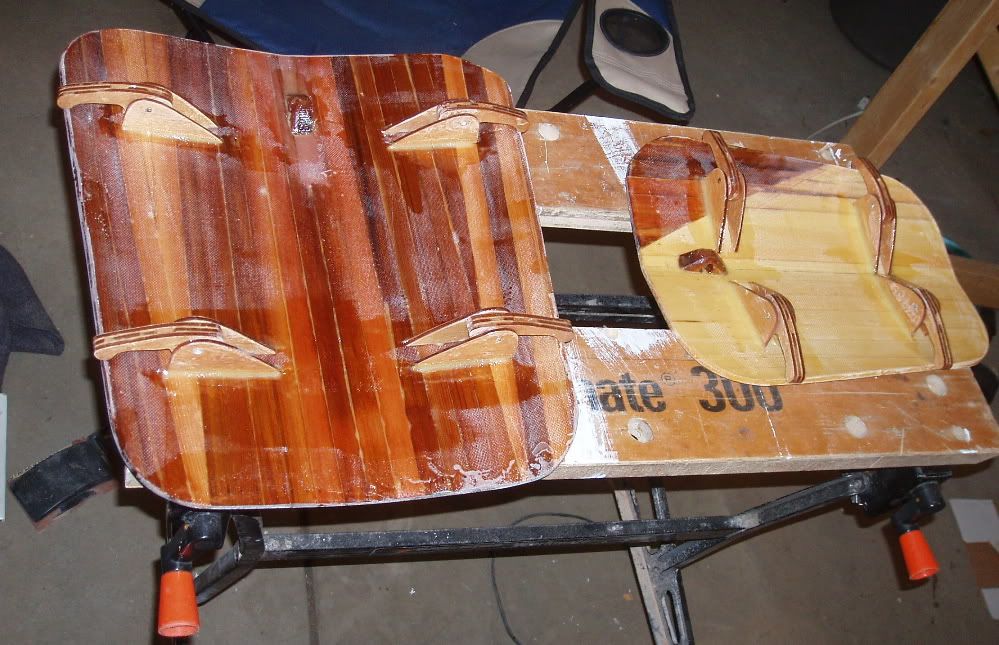
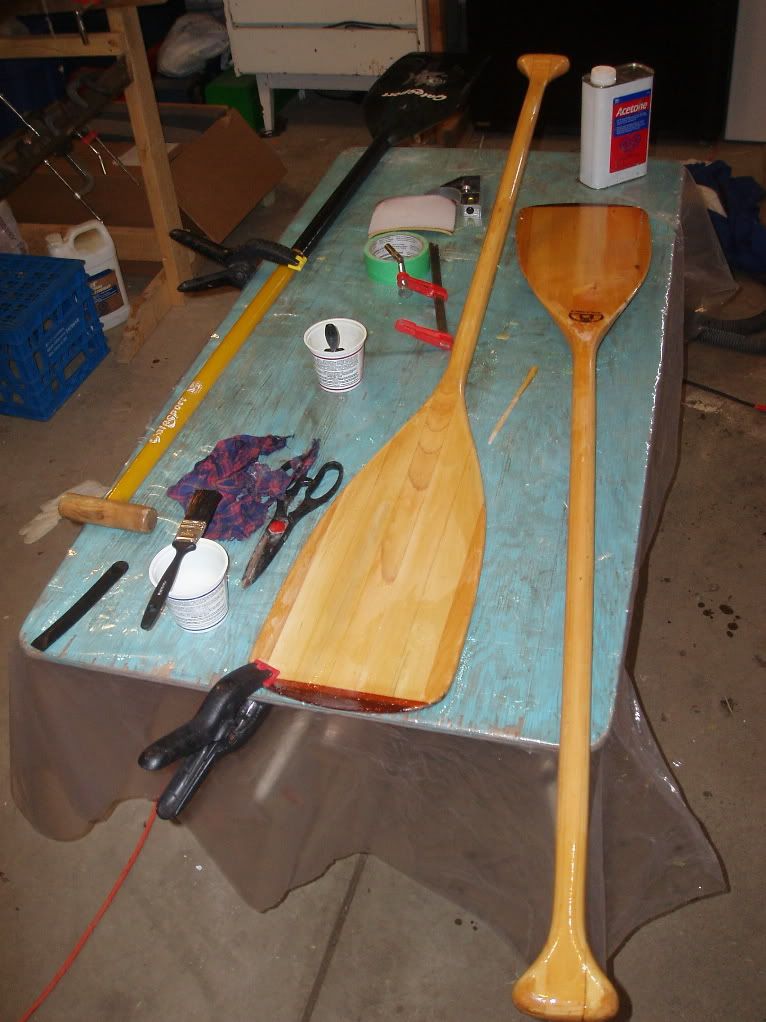
I have also been working on getting some paddles ready for the season and they too are now just about ready for varnish. Last fall on a trip I suffered two broken canoe paddles. For some unknown reason the blade of my wife's bent shaft paddle split (which is a problem since she wasn't even on the trip). Also, my own bent shaft suffered a broken grip when one of our esteemed members of North Star Expeditions used it to put a nice walleye out of it's misery and hit a rock instead. This paddle too had cracks beginning to develop on the blade. Thus, both paddles received 4 oz glass cloth patches at the cracks on one side (non-power face) while the lower 75% of the other side was covered in sheath of 4oz glass and the weave filled by squeegeeing very thin coats of epoxy on. The handle of my wife's paddle was also wearing from abrasion so it received a coating of epoxy (something I had done to my own paddle years ago and as a result of which has not deteriorated at all since). The third paddle I'm repairing is a fiberglass whitewater canoe paddle, recently purchased used from Jimmy MacDonald (he sells new paddles and other paddling stuff so get in touch with him if you need something). As this is a used paddle, it has seen the occasional rock and there was some damage to the edge. I repaired the damage and reinforced the rest of the edges by adding a strip of 4oz cloth to both sides. Both of the wood bent-shaft paddles will receive full varnish, while the whitewater paddle will receive varnish on the repaired areas of the blade to protect it from UV. At the same time I will also add a finish to the greenland paddle I built some time ago. I think I will give that one a tung oil finish.
Hey.. nice info, thanks for taking the time to post. Have you blogged about the Mobies yet?? I'm ready to make some, just wondering if there was any additional info out there on them.. thanks.
ReplyDeletehappy paddling.
S.
http://shawnwaite.com/wordpress/?cat=2
I think this link should take you to some additional Moby Latch pictures. I'll add some more shortly as they are now funtioning.
ReplyDeletehttp://s77.photobucket.com/albums/j43/pawistik/Kayak/moby%20latch%20mechanism/
Cheers,
Bryan
Hmmm... the link I left a long time ago didn't work. Try this one: http://s77.photobucket.com/albums/j43/pawistik/Kayak/moby%20latch%20mechanism/
ReplyDelete