It was a beautiful sunny day today. I took the kayak outside and set it up in the sun so that the varnish could cure in the warmth of the sunlight after last night's final coat on the hull. Since I could finally take a couple of pictures in natural light, I did.
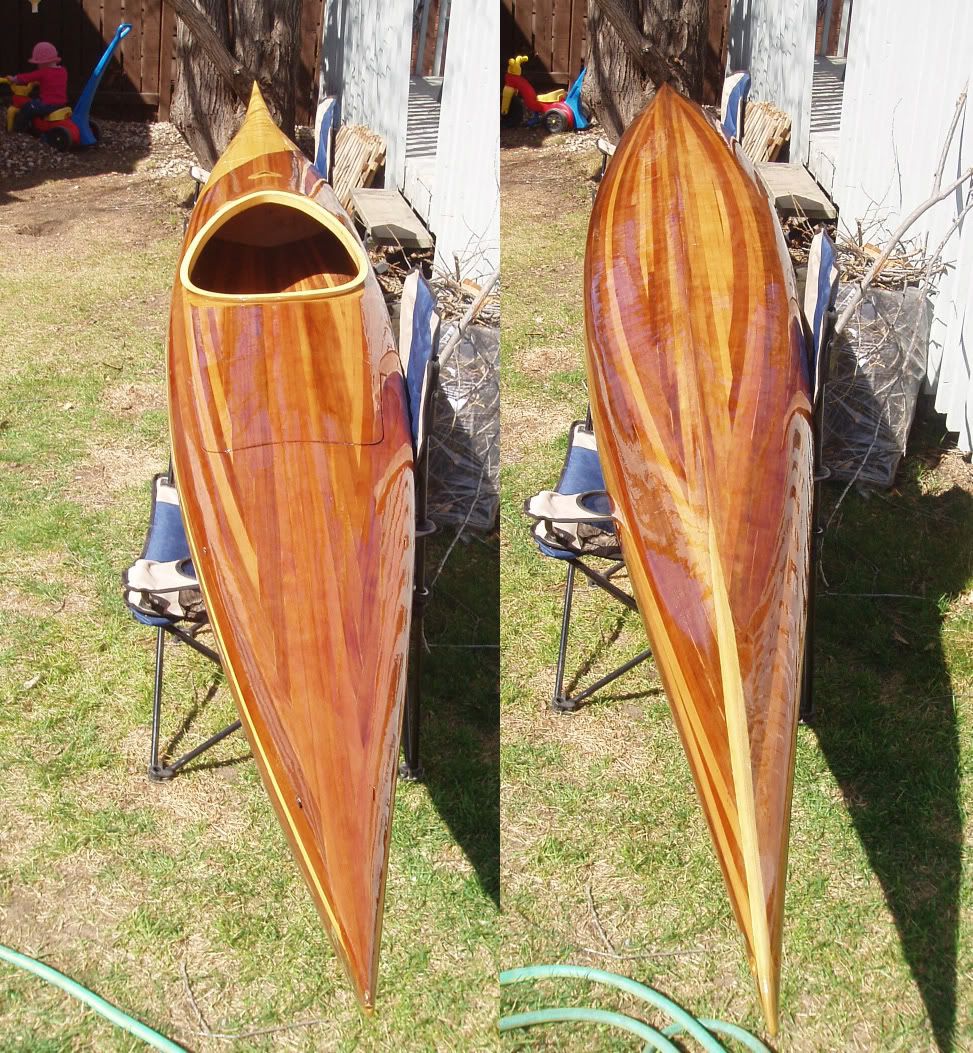
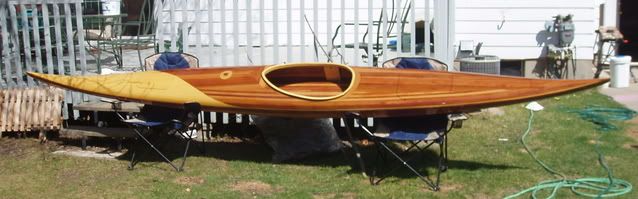
One more coat of varnish on the deck and I think that's it for varnishing.
Looks great. I particularly like the swoop on the bow, and the detail just in front of the cockpit. Great work.
ReplyDeleteI was curious what material you used for gaskets on the hatches, and if you cut any drain channels. I'm looking into my hatches now, but I'm suffering from indecision :)
Hi Chris,
ReplyDeleteThanks for the comments. I haven't bought any gasket material yet, but plan on using weather stripping. To form the gasket channel, I used weatherstripping from the hardware store. I am pretty sure that a year ago when I bought the stuff I got 2 sizes. The thinner one was used to form the channel, and a thicker one that was to be used as the final gasket. However since I can't find it I'll have to go buy it again.
Regarding the drain channels, I added grooves on each side that will serve as a place to get a finger in under the lip of the hatch in order to open it. To make it I put a cylindrical sanding drum into the drill (maybe 1.5" diameter) and with it held horizontal sanded in the channel. You can sort of see it in the larger version of the pictures in this post if you follow the link (photobucket makes the picture look pretty bad becasue it resampled it when I uploaded them). It is my understanding that these grooves will also serve to drain water away from the gasket. I wasn't going to add these, as I was going to put a loop of webbing into the lid for opening, but I decided that this will look a lot better.
Cheers,
Bryan